If you saw my guest blog over at
733 during her Creativity Week back in February, you've seen this project already - but if not, here's a great new project, and I (almost) guarantee you've got all these supplies in your home right now.
Quick and Easy Pencil Holders
What You’ll Need
An empty aluminum can
Scrapbooking paper
Ruler
Pencil
Scissors
Glue
2-inch punch of your choice
Initials printed on cardstock
What You’ll Do
Wash out and dry your can. Then remove the paper label.

Pick a scrapbooking paper or decorative paper of your choice. Measure the can’s height from just under the thick lip at the top of the can to the bottom.

Mark the length on the back of the paper and draw a line with your ruler and pencil where you’ll cut. Then cut the paper at that line.
Glue the paper to the can and wrap the paper around, gluing in a few places as you go. You’ll have a point in the back where the paper meets. On smaller cans, you might have to cut a little of the length off. On larger cans, you might have to add a patch.


I printed off my initial in a few different colors and styles.

Then, using a paper punch in any style or size, (I used a 2-inch square punch and a 2-inch circle punch, both with scalloped edges.) punch out the initial. On the opposite side of where the paper ends meet, glue the letter on.
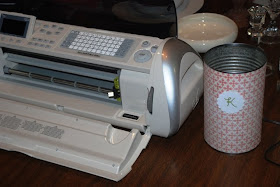
And voila – you’re finished! A great (inexpensive and super easy) pencil holder – or marker holder, or pen holder, or anything-you-can-think-of holder!
I use the larger one beside my Cricut to throw away little shreds.
I'm joining a few blog parties this week. Check out where you can join them on the right side of the screen, and go check out with others are sharing.


