Friday, June 25, 2010

Cupcake Carnival: Tierra from Pebbles and Poppys

Hi, my name is Tierra and I have a little blog called Pebbles and Poppys. I have many different things on there such as crafts, tutorials, recipes, photography, downloads and whatever else I can think of.

I was tickled pink to have Kimberly ask me to submit an idea for her wonderful Cupcake Carnival. I have so many ideas running through my head it's hard to choose. Here is what I came up with.

I have this daughter.... who has this aunt..... and they both love cupcakes. Every time they are together they have to make cupcakes. It's a tradition with them and it's always something they look forward to.

About a year ago Auntie decided to branch out with the cupcakes and get Caelan an apron with cupcakes all over it. Of course Auntie had to get a cupcake apron too. The two of them are so cute about their cupcake parties. It's even gotten Mom, Dad, Grandpa and Grandma hooked into the parties. (You see Caelan is the only girl on this side so anything girlie is so much fun.)


Auntie even got a baking pan that made a HUGE cupcake cake. I think Caelan was trying to claim the whole thing. That made us laugh a little.


We saw this book one day and HAD to get it for Auntie because it was so perfect. Auntie has a cat that she loves and what's better than giving a cat a cupcake?


For a lot of people that don't have the option of eating everything they want there is a website called Gluten Free Goddess. She has many different recipes for cakes and cupcakes that look really yummy and are gluten free. Click on the picture to take you to the post with all the recipes on it.


The other two blogs that my SIL sent me to are Coconut and Lime and Cupcake Project. Check them out. They are yummy recipes.

I also went to a local cupcake shop to try them out and ended up with 6 cupcakes instead of 2. Yeah right. Like I was going to only just get two. The cupcake shop is called Icing on the Cupcake.

Thank goodness the shop isn't just around the corner or I would have problems.

This cupcake I got for my son. Perfect right? It's called the Kiddie Cake.


My daughter loves pink so I knew this is the one she would choose. This one is called the Pink Delicious and it is their signature cupcake.


Here are some of my favorites that I bought. The Red Velvet is my favorite. I just love cream cheese frosting. The other two are Chocolate Macaroon and Caramel Apple. My husband doesn't like apple desserts and kept ribbing me about getting that one over the Mint Chocolate one. It's been two weeks and he still ribs me. *sigh* I think I am going to have to make him a chocolate mint something just make amends. I do have to say that the Caramel Apple one was good though.


The last cupcake of the bunch that I bought was the Raspberry Lemonade. That just makes your mouth water when you hear that right? It made my mouth water just biting into it too. It had a kick to it and a perfect balance of sweetness.
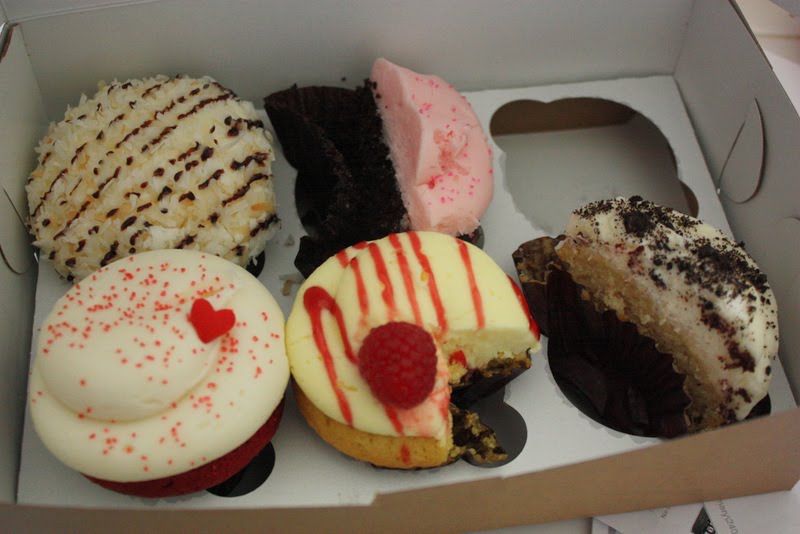

All in all I loved the cupcakes but I really don't want to ever go back in because they are kind of pricey. It was $15 for the 6. I split a dozen with a friend that came with me. For those that know me, I am a bargain shopper and that much on cupcakes is a once in a blue moon kind of purchase.

And to leave you with a little something for stopping by, I have created a printable card for you to download and use. Just click on the picture and it will take you to a website that you can download this for free. Enjoy!


Signature
www.pebblesandpoppys.blogspot.com


See something you like? Print it. Share it. Email it. But please, link back here when you do.

Cupcake Carnival: Stephanie Lynn from Under the Table and Dreaming

Hello Cupcake Lovers!
I'm Stephanie Lynn from
Under the Table and Dreaming
UndertheTableandDreaming

I'm so excited to be participating in
Kimberly's Cupcake Carnival!

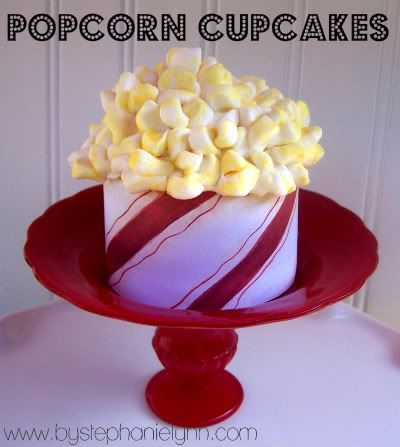
I love to take a theme and run with it for my little guy's birthday parties. For his second year bash we held a Carnival Extraordinaire {here} and of course we had to have a themed cupcake to go along with the festivities; What carnival isn't complete without some popcorn!


These are very simple and easy to put together and they don't require any special decorating skills, I promise!


You want to begin with a cupcake of your choice. I used a large cupcake pan to bake my cupcakes, however, these can be made with any flavor batter or size pan. {Dare I even say, store bought cupcakes would work too!}. You want to ice your cupcake with any type of white frosting, preferably creating a swirl mound. This will give height to your popcorn pile.


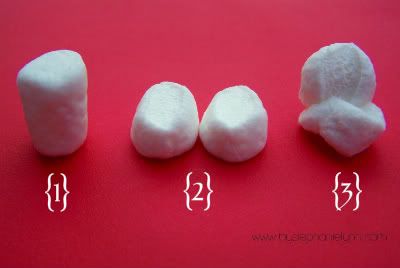
To create the 'popcorn' you will need {1} mini marshmallows as shown in photo above. {2} Using a knife cut the marshmallow in half. {3} Squish the two cut halves back together at one end. You will need quite a bit to cover a batch of cupcakes so while your cupcakes are baking you can work on this step and place them in a ziploc until you are ready to decorate.


Working in a random pattern, begin placing the prepared marshmallows onto your cupcake. The icing will hold them in place. You want to make sure you cover as much icing as possible, leaving as little of space possible between each piece.


To add a 'butter' effect to the popcorn, take a tiny bit of water, add two drops of yellow food coloring and mix well.


Using a paint brush {preferably not the ones you have already used crafting =)} lightly brush on the water mixture to your marshmallows.


I found a neat red and white striped scrapbooking paper at my local craft store which I used to make simple wrappers to cover the cupcake liners. I cut the paper into strips {wide enough to cover the entire cupcake liner} and taped the ends together to create a circle. You want the circle to be the circumference of the top of the cupcake; where the liner meets the cupcake. This will allow the cupcake to nicely fit into the wrapper and only expose the 'popcorn' top.


Yummy Goodness!


I hope you all have a fabulous weekend ~ Stop by and say 'Hi' if you get a chance!
I'll show you how to put together these cute stands =) Enjoy!
Thank you so much Kimberly for letting me celebrate Cupcakes with you and your readers!


See something you like? Print it. Share it. Email it. But please, link back here when you do.

Thursday, June 24, 2010

Cupcake Carnival: Easy DIY Cupcake Flags

For the cupcake party I hosted for some friends (you can see the post about the party here), I made each guest 24 cupcake flags. They could use it at the cupcake party (like in the strawberry cupcakes below) or keep and use them later.


If you want to have something like these flags at your own party, or for a special occasion, or just for fun, you can make them super quickly and without a lot of special products (i.e. no Cricut needed). Now sure, you could get super detailed and make some flags that are labor intensive and time consuming, but I'm just here for the cupcake.

With all the great scrapbooking papers, the possibilities are endless!


What You'll Need
Cupcake Punch (the one I used was by Martha Stewart)
Circle Punch (I used a 1" and 1.5" circle.)
Double-sided tape or mounting squares
Scrapbooking squares
Toothpicks
Glue


Punch out lots of cupcakes and circles. I mix and match tops and bottoms on coordinating circles.


Place a small slice of double-sided tape or mounting squares in the center of the circle. Tape down the bottom half of the cupcake and then the top half.


Flip the circle over and squirt a small line of glue (school glue works fine) from the center of the circle to the edge. Just make sure the cupcake is vertical on the other side. (I had a few cupcakes that tilted just a bit. Oops!) Then nestle the toothpick in the fresh glue. Let the glue dry three or four hours.


So there you have something very, very cute and easy for your party or special occasion.


Kimberly


See something you like? Print it. Share it. Email it. But please, link back here when you do.

The Hummingbird Bakery : Guest Post from Beachbrights


Hello Attempting Creative Readers! My name is Beachbrights and I am a Decorator, Organizer, Shopper, Blogger, Cook, Seamstress, Book Reviewer and Herder of Son & Husband (not necessarily in this order).

Those of you who know me, know I can't bake. Cook, yes. Bake, no and yes, there is a difference. However, that has all changed my friends. I now can bake cupcakes. Here is my review of this simply marvelous, magical cupcake recipe book. Buy it. I promise your cupcakes will be TO. DIE. FOR.


The Hummingbird Bakery Cupcake Kit
*contains cookbook & 100 cupcake cases
by Tarek Malouf
Feb 28, 2010
ISBN-13: 978-1845979935

My Review: For this review I completed the vanilla cupcakes recipe (page 16) with vanilla icing (page 11). Honestly, I wanted to try the red velvet cupcakes with cream cheese icing but I have never had success with baking cupcakes and I did not want to try a recipe that required any additional work than necessary. The vanilla cupcakes turned out so delicious and perfect, I wish I had made the red velvet. Now I have the confidence to make both. Honestly, when I tell you I can't bake, I mean it. This is my very first successful batch of cupcakes.

What I loved most about this book is the simple ingredients and small serving sizes. The recipe did call for caster sugar which I found I could make my own by putting regular sugar in a food processor.


I also had to buy unsalted butter and whole milk, both common ingredients but not what I normally keep on hand. Everything else I had (of course every kitchen will be different). The book is small but very cute and Peter Cassidy does a great job photographing all the different varieties of cupcakes & muffins. Several to cupcakes note: vanilla, red velvet, chocolate, lemon, strawberry cheesecake, black bottom, lavender, banana & chocolate, green tea, pumpkin, & marshmallow. Several muffins to note: carrot & zucchini, spinach & cheese, blueberry and maple & pecan. Buy this book. 5 stars!


*One thing I would note. I like my cupcakes to have a little more icing on top. Next time I will consider doubling the icing recipe.

The Hummingbird Bakery

~XOXO~

Wednesday, June 23, 2010

Laurenmakes Giveaway Winner

Congratulations to Debbie!! She wrote lucky comment #23, and she is the winner of 24 customized cupcake flags from Laurenmakes.

Here's what Random.org picked...


Here's what Debbie said...


Debbie, I'll be e-mailing soon you to get contact information.

Now guess what? guess what???

There's still one giveaway going on before the end of the Cupcake Carnival. It's for hand-illustrated, hand-glittered Cupcake Couture cards and gift tags from Icing Designs. Check it out and enter to win here.


See something you like? Print it. Share it. Email it. But please, link back here when you do.
Cupcake Carnival: Cupcake Party Invite

Have you signed up for the Icing Designs Giveaway yet??? Do so now! Click here.
--------------------------------------------------------------------

So did seeing the Cupcake Party pics spur thoughts of "I'm so doing that, too!"??


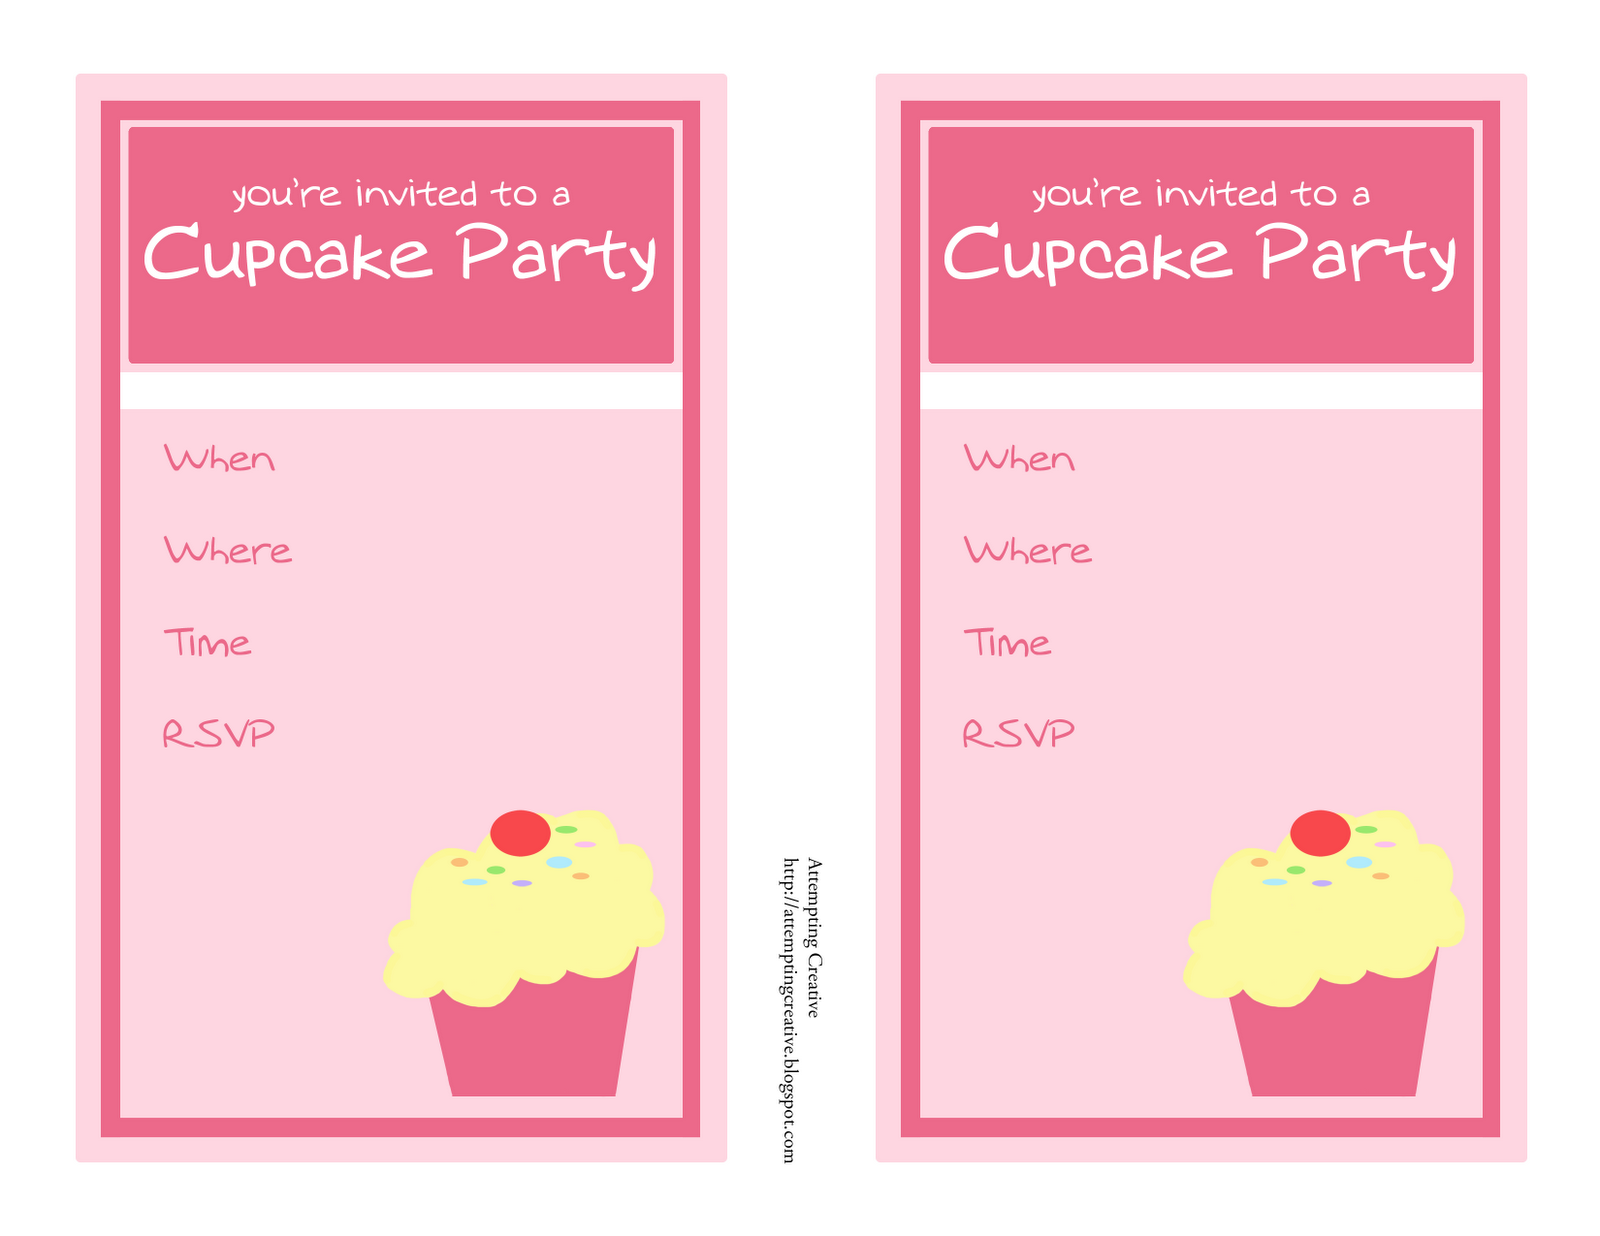
Just in case it did, here's a free printable invitation you can use for your party!

You can click on the picture or download it from Sribd here.

And if you throw a cupcake soirée, please, let me know! I'd love to see what you all do.


Kimberly


See something you like? Print it. Share it. Email it. But please, link back here when you do.

Cupcake Carnival: Lindsey from The Lovely Paper Blog


Hello! I am Lindsey from The Lovely Paper Blog! I was delighted when Kimberly asked me to guest post during her yummy Cupcake Carnival because I LOVE anything to do with cupcakes!


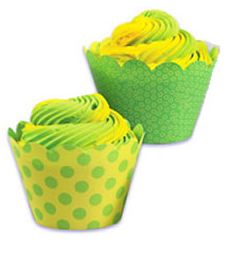
I love making cupcakes, because they are so yummy and they can be so cute! I love finding cute cupcake liners, but I hate it when they blend in with the cupcake after I pull them out of the oven. You know what I mean? So, in an effort to find cupcake papers that don't fade in the oven, I found these darling cupcake papers at Fancy Flours and... oh my! I'm in love! To use them, you cook your cupcakes with ordinary [cheap] cupcake liners and then you wrap these cupcake papers around your cupcakes when you are done decorating. So cute, right?


Unfortunately, these little cupcake papers can be a bit pricey... so I made up my own template, which you can download here. Making my own is so much more fun, because I can use any paper I want (not to mention the fact that I am saving money)!


To make your own cupcake papers, all you have to do is:

1. Download and print off the template

2. Trace the template onto cute paper

3. Secure it together with a little hot glue

4. Place your delicious cupcake inside

This adorable cupcake was decorated using the cupcake paper template:


The Lovely Paper Blog is about all things paper! It is also a creative journal in cahoots with The Lovely Paper Shop website where we design and print custom wedding invitations, baby announcements, and personal stationery.


See something you like? Print it. Share it. Email it. But please, link back here when you do.
LinkWithin

Related Posts with Thumbnails