


What You'll Need
Almond Can (or any can -- This one is just shorter and wider than some.)
1 piece of fabric to cover outside (11 1/2" by 2 1/2")
1 piece of fabric, cut into a circle with about a 5" diameter
Mod Podge
Sponge Brush
Fiberfill
Scissors
Small circle of felt
Button
Scrap piece of fabric for flower
Step 1. Eat all the almonds. :) You can get help with that.
Step 2. Strip the can of the paper wrapping and remove any stuck-on scraps of glue.
Step 3. Cut a piece of scrap fabric to 11 1/2" by 2 1/2". Mod Podge the fabric to the can's outside with your sponge brush. Let it dry several hours.
Step 4. Fill your can with fiberfill with a little extra for height.
Step 5. Cut a circle - about a 5" diameter. With some fiber fill under the fabric cricle, push the edges of the circle down into the can, securing under the can lip as you go.
Step 6. Make a fabric flower any way you know how. I took the edge of fabric (called the selvage or selvedge), folded the material -- about 12 inches for this flower -- into pleats and stitched the pleats with a straight line in a sewing machine. Circle the fabric into a flower and hot glue together. Cut a small circle of felt and hot glue into center of flower (covering up the end of your fabric) and, if you want, glue a button onto the felt circle. For a better tutorial, click here. Attach to the side of the can.
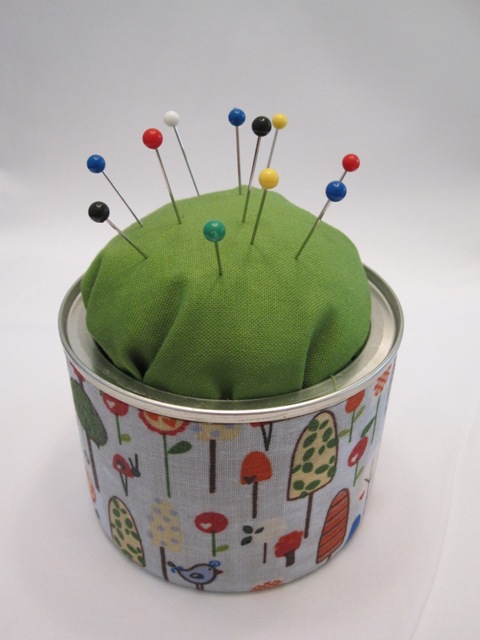
And you're done! A very inexpensive pincushion for your sewing projects.
Have any of you also been inspired by Susan's tin can pincushion?
See something you like? Print it. Share it. Email it. But please, link back here when you do.

No comments:
Post a Comment