Wednesday, June 30, 2010

Martha's Star Medallion

I think we should all do crafts that challenge us. (Right?) That's why I've started sewing with a real sewing machine. (It's all straight stitches right now.) And that's why I've held knitting needles to see if the urge strikes me to take a class. (Not yet.) And that's why I stood in the cake-decorating section of Hobby Lobby for 15 minutes yesterday staring at gel coloring. (Didn't buy anything. Couldn't figure out if you could use icing coloring in cake batter. Apparently you can.)

But on this one, I was almost bested. Not because it was so technically challenging. Not because it required a special skill.

No no, it's because I can't follow directions.

You know, directions. That thing you've been told to follow since you understood there were directions to things.

But, for not being a direction follower, they turned out okay. Don't you think???


Wanna make some of these star medallions for your Fourth of July Party? They don't take long, and there's some time before Sunday.

Here's what you'll need and what you'll do...


What You'll Need
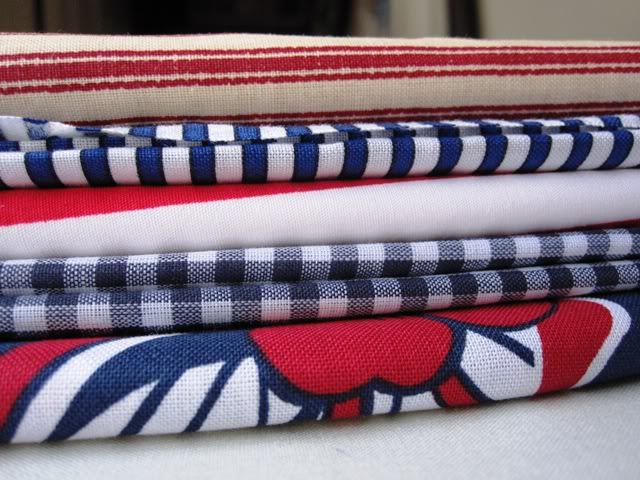
Cotton fabric (not a heavy weight)
Spray starch
Iron
Ironing board
Pins
Sewing gauge
Sewing machine
Scissors
Fusible webbing
(or) Hot glue gun
Matching ribbon

Step 1 - Cut a length of fabric. The width of the fabric will be the diameter of the medallion, and the length should be about 1.6 times the width. So, as Martha Stewart's directions explain here, for a 15 1/2-inch medallion (width), cut about 25 inches of fabric (length).

Stripes can radiate from the center or circle out from the center, depending on the direction of your width. I did both.

If you have any extra material left at the end (as I did because my folds seems to get slightly bigger with each fold), just cut away at the extra.


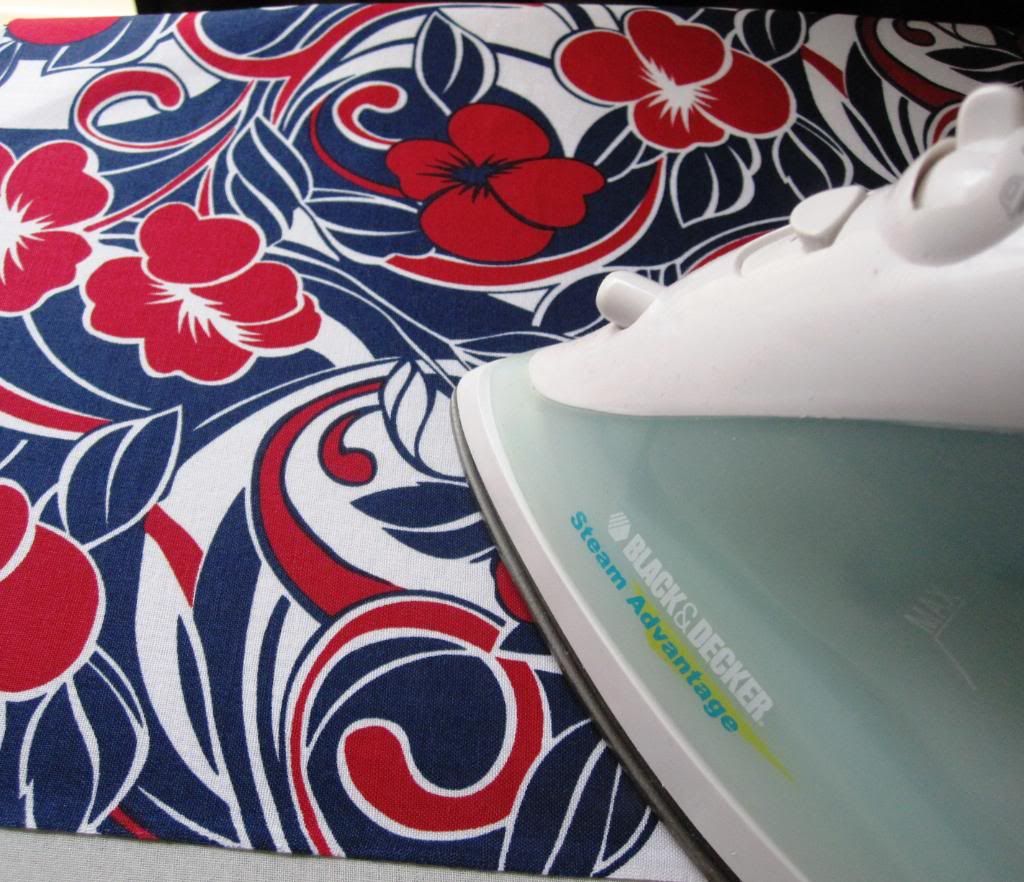
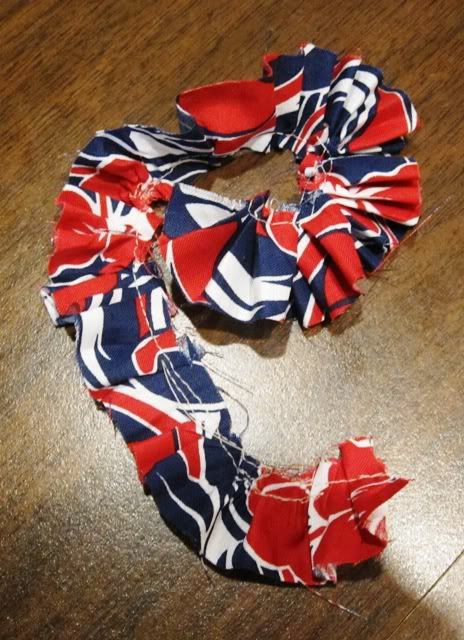
Step 2 - Fold fabric in an accordion-style at 1 1/2-inch sections. I used a sewing gauge to mark 1 1/2 inch. Then, I pinned the first 1 1/2 inch fold down so it was easier to iron. After the fold, spray starch on the fold, and iron. Continue folding the length of fabric.

Your first and last folds should point in the same direction. Either both down or both up.


I noticed while I was ironing the medallions that this was "Fresh Lavender Scent." I love spray starch, but the lavender had me sneezing. Oops!


Step 3 - Fold the long rectangle in half, and pinch it together so you can see the center. Then stitch along the center of the rectangle to create the pivot.


Step 4 - With your sharp scissors (or rotary cutter if you have it), trim both ends of the folded rectangle. at a 45-degree angle, from the raw edge of the fabric. The easiest way to describe this: the raw edge should be in the scissors blade first.

I tried different angles for a different look, and it was a total failure. Do the 45-degree angle.


Step 5 - Here, I changed up Martha's directions a little bit. There are two ways you can do this. I'll explain both, and you can do whichever you think would be easiest for you.

Non-glue: Cut a piece of ribbon that will be used to hang the medallion, about six inches, and set it aside. Cut fusible webbing the length of half the full rectangle. I used two strips to cover the rectangle side to side.

Connect the sides of the medallion by fanning the fabric over and ironing the two ides together. (This is pretty difficult - not going to lie. It's hard to iron with the pleats.) Before you iron the tip, sandwich the piece of ribbon between the fusible webbing and the medallion.

Connect the other half of the medallion with the fusible webbing. Leave out the ribbon on this side.

Glue: (This is much easier!) Cut a piece of ribbon to use as a hanger, about six inches; longer if you want. Heat up your hot-glue gun. Apply hot glue on one side of the folded rectangle, then fold and firmly press the other half onto the hot glue. When you get to the top, glue in the ribbon. Repeat the gluing process for the other side of the folded rectangle.


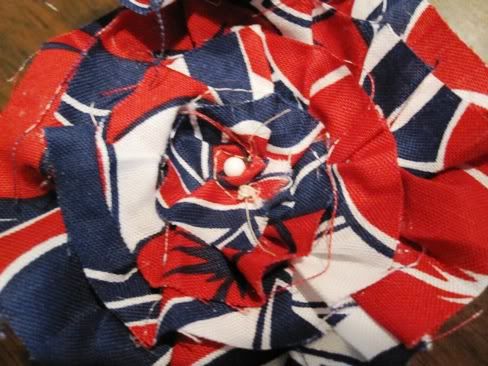
Step 6: Then you're done! Now just hang your medallions. I used fish line to give the appearance that the medallions were floating.


And at night...


Kimberly


I'm linking up to these parties:

SYS Thurs

Visit thecsiproject.com


It's a Blog Party


See something you like? Print it. Share it. Email it. But please, link back here when you do.

Tuesday, June 29, 2010

Fourth of July Wreath

What's red, white, blue, and burlap? Fourth of July wreaths, of course! This was such a fun wreath to make, and it would be an easy one to repeat, in one way or another, for lots of things.


What You'll Need
One wreath form
Burlap
Scissors
Hot glue
Fabric
Buttons

I went with a lighter burlap, but you could use the darker, more natural burlap. Or even a fun red or bleached white. I did see a navy blue burlap once. That would be really fun!


Cut the burlap into long, thin strips, and wrap the wreath with the strips. These strips were about 1 1/2 inches wide and about 3 feet long. It took several strips to cover the wreath, but I was wrapping them close together so you couldn't see the green wreath form underneath.


Once the wreath is wrapped, you'll likely notice lots of stray ends and frays. Just snip those off to clean up the look of the wreath.


I found this fun red, white, and blue Hawaiian print at Joann's Fabrics a few months back. I was hoping I would find a fun project for it eventually. (I know I'm not the only person who buys stuff thinking, "I'll eventually find something to do with this." Right???)

I always like to iron the fabric before starting a project. That might be one of my OCD tendencies sneaking out. Or, maybe I once heard Martha Stewart say to do that.


Next, you'll make the flowers any way you know how.


For these flowers, I don't think I invented any new way of making them. I'm pretty certain someone else has thought of it and has probably made a tutorial about it, too. I tried to follow a few tutorials to make some flowers I had seen elsewhere, and it did not go well. It was bad, in fact. I almost gave up on make-your-own flowers.

But I didn't. And you shouldn't either!


So just in case, here's a quick flower tutorial.


Step 1 - Cut the material into strips about one-inch wide. Length determines the size of the flower. Shorter strips make smaller flowers; longer strips make larger flowers.

Step 2 - Sew a straight line down the fabric, off center, and pleat as you go. It helped to start a few pleats before sliding it into the machine. Then stop, pleat a few more, and sew.


Step 3 - The fabric will likely pull in a spiral with the pleat. Take one end and begin wrapping the material around, hot gluing in place as you go. For smaller flowers, you can also sew an X-pattern through the center to hold all the layers together. For larger flowers, hot glue worked best for me.


Step 4 - Once the flower is put together, take a pin through the center, and secure it in place on the wreath.


Step 5 - Hot glue a button on top of the pin. For added decoration, you could also cut out a small circle of fabric, or fabrics, then glue the button on top. Lots of ways to add some spunk to the flower.


Step 6 - Make flowers of varying size, and arrange them on your wreath however you like. Then hang, and enjoy!


Kimberly


It's a Blog Party


SYS Thurs

Visit thecsiproject.com


See something you like? Print it. Share it. Email it. But please, link back here when you do.

Monday, June 28, 2010

Patriotic Pillows

What does the Fourth of July mean to you?

For me, it's the view from the lake's shore, the smell of sunscreen and fireworks, barbecue and potato salad, flip flops and sunglasses. It's family and friends and the wonderful warmth of summer's glow. And, of course, it's patriotic decorations...

...Which starts with a stack of red, white, and blue fabrics in every pattern and style. :)


And continues with my mom's design and sewing skills...


...and 18"x18" pillows.

P.S. My mom also made my Easter and St. Patrick's Day pillows.


So what does the Fourth of July mean to you?


Kimberly


I'm linking up to these parties:

SYS Thurs

Visit thecsiproject.com


It's a Blog Party


See something you like? Print it. Share it. Email it. But please, link back here when you do.

Icing Designs Giveaway Winner

Congratulations to Naazia!! She wrote lucky comment #5, and she is the winner of the Cupcake Couture hand-illustrated, hand-glittered cards and gift tags from Icing Designs.

Here's what Naazia said...


Naazia, I'll be emailing you soon to get your information for Melissa and Kellie at Icing Designs.


See something you like? Print it. Share it. Email it. But please, link back here when you do.

Friday, June 25, 2010

Cupcake Carnival: Fourth of July Flavor

In case you haven't looked at a calendar in a few days, we're only nine days from the Fourth of July.

Nine days from red, white, blue, patriotic firework displays overload.

And I can't wait! Can you??

Next week (when I'll inevitably be in a post-Cupcake Carnival stupor), I'll be sharing some fun Fourth of July crafts I've been working on. But I thought I'd get an early start and combine cupcakes with patriotism for one last Cupcake Carnival post.


How great are these tiny Patriotic Pops from Bakerella? Could you stop at just one?? (Me either!)


Martha Stewart has another great one with these Flag Cupcakes made with red licorice and blue buttercream.


See you back here on Monday for Fourth of July crafts! Don't forget to enter the Icing Designs giveaway by midnight tonight! (You can do so here.)

Kimberly


See something you like? Print it. Share it. Email it. But please, link back here when you do.

LinkWithin

Related Posts with Thumbnails