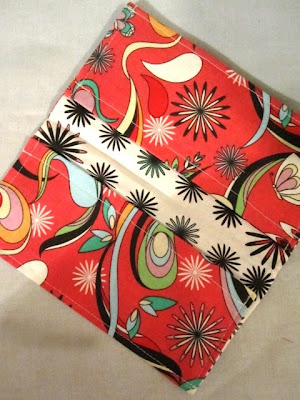
I've been meaning to put up a tutorial for the ruffle checkbook cover for a few weeks now, but I keep getting distracted with other projects. So I finally made myself do it! (At midnight. On Sunday.) I'm totally dedicated to you guys like that.
Plus I had major insomnia from drinking like 6 glasses of soda that day.
What You'll Need
1/4 yard fabric for checkbook cover outside (the multi-color dots in the top example, the persimmon print in the bottom example)
1/4 yard fabric for checkbook cover inside (the khaki in the top, white floral in the bottom)
Strip of fabric about 12 inches long (width is up to you) for the ruffle
1/2 yard fusible interfacing for light- to medium-weight fabrics
Matching threads - One should match the ruffle. The other should match the front of the cover
Rotary cutter or scissors
Cutting mat
Ruler
Disappearing ink pen
Template - needs to be 7 1/2" by 14 3/4"
For the template, I taped together two pieces of paper, then measured a template with my ruler and cut it out. I've seen a few templates around Blogland for download. Those will likely work too.
Be sure to press your fabrics before cutting. This helps you get the best cut for the project.
Step 2 - With your template, cut two pieces of fusible interfacing. You may wish to make the interfacing slightly larger than the fabric so you can ensure the entire piece of fabric is covered. In that case, just be sure to trim off any extra around the edges once you've ironed on the interfacing.
Step 3 - Being sure to follow the instructions on the package, attach the fusible interfacing to the backs of both fabric pieces (inside and outside).
Step 4 - Make the ruffle strip.
Again, be sure and press the strip of fabric with your iron.
Fold over the edges of the strip and pin in place. If you want to skip this step, you can, but be aware your edges my fray. You can also surge the sides or zig-zag. Lots of options here. I just fold and stitch.
Press the folds down, using some spray starch for extra crisp folds.
Following your folds, stitch 1/8 seams along both sides to secure the folds.
With your stitch size on the largest setting (I don't know if I did that here or not. I think I did), stitch down the strip of fabric in two places, off center. In the picture below, the far left stitch is the edge. The next stitch is the first run for the ruffle, and I'm sewing the second run. Do not backstitch. You need to be able to pull the thread.
When you've completed that, grab one of the threads from each of the two runs and gently pull. The material will begin to gather. Work the ruffles toward the center as you pull from both ends.
When you're happy with your strip of ruffles (more or less, tighter or looser, etc.), you need to place and pin it on the front of the checkbook cover. To find that spot, I measure to the halfway point of the piece of fabric. That will be the top fold of the cover. Then I measure down about 1 1/2 inches and pin it. You can play around with that amount if you want the ruffle more toward the center, higher, lower, etc. It's your thing; do what you want!
Then (back to regular-sized stitches here), stitch the ruffle in place by following (as best you can) the stitches you put in before to make the ruffle.
A note (that I'm still trying to remember) from reader Jan: Place your pins cross ways, so that if you don't remove one, there is no drama as your machine just sews over it and your fabric remains stable while you're sewing. (Thanks, Jan!)
And then you probably have a little of this number below. That's good! That's all right. You want that because that will help secure the ruffle when you sew the two sides of the cover together, which happens..... now!
Step 5 - With right sides of fabric together (interfacing outward), stitch on the long sides of the fabric with a 1/4-inch seam.
Step 6 - (First, ignore that my sides aren't even. Oops!) With your scissors or rotary cutter, trim the sides of your ruffle strip.
Step 7 - Press seams open. Then turn sleeve right side out, and press again.
Step 8 - On the outside fabric and with your disappearing-ink pen, measure 3 1/2" from each short end. Mark across the fabric using a ruler. Then measure 1/2" from each short end and mark across the fabric using a ruler.
Step 9 - If you have one, surge the short ends (where the two pieces aren't already sewn together). I don't, so I just did a zig-zag on the edges to stitch the material together and keep from raveling.
Step 10 - Fold the 1/2" line toward the inside of the checkbook cover. Iron at the fold, and clip the corners. (See photo.) This is to reduce bulk when you're sewing.
Step 11 - Stitch 1/2" from folded edge, ensuring you're capturing the fold. Now repeat these last two steps on the opposite end.
Step 12 - At your 3 1/2" mark, fold both ends of the cover into the center. Press with your iron. Now your checkbook will look like mine in the picture below.
Step 13 - Being sure to backstitch at both the beginning and end of your line, sew 1/4" seams down both long sides. (If you don't want to stitch in the middle, you can stop at the end of each fold and start again on the other fold. Just be sure to backstitch.) Then sew 1/4" seams along both short ends. Again, backstitch to secure your stitching.
Clip any straggling threads. Put your checkbook in, and you're done! Your very own custom ruffle checkbook cover.
Have any of you had a chance to make your own yet? Tonight I'm going to work on a coordinating sunglasses case - and maybe even a mini zippered bag.
And one day soon - I'll get back to crafts that aren't all sewing. Promise! :)


See something you like? Print it. Share it. Email it. But please, link back here when you do.


3 comments:
GREAT tutorial! Very clear and easy! Thanks! I'm adding it to my to-do list. Definitely a Christmas gift item!
-Nicole
www.craftmysoul.blogspot.com
I adore ruffles! Thanks!
Thank you for posting this tutorial with the ruffles i have added it to my to sew list and will probably make this for my mum :)
Mayya @ Sew Chic and Unique
Post a Comment