Wednesday, July 7, 2010

Look, mom! I'm sewing!

c-u-r-r-u-m-p!

c-u-r-r-u-m-p!

c-u-r-r-u-m-p!

Saturday morning's siren call. My mom and her shears.

Methodically slicing through the delicate tissue paper, the foundation for a skirt, a sleeve, a dress.

My mom once asked me to help sew some chair backs for her classroom. "It's just straight lines," I thought. "No big deal."

I'm certain I made more of a headache than my "help" was worth.

A bad first experience, to say the least.

15 years later, with the encouragement of you fellow bloggers, I asked to try again.

My first venture, a success.

My second, a garment bag, here. Fodder for future projects. Encouragement to try something new.

♥ Kimberly


Step 1: Iron the two right sides together for more-precise cutting. Cut the material for the size of bag you want. Mine was a 13-by-31-inch piece of fabric that eventually created an 11-by-13-inch bag.


Step 2: Pin together (with right sides facing) the two pieces of material.


Step 3: Sew together, running along your pins, about 5/8-inch in.


Iron the material again. (I probably iron too much, but it doesn't hurt, right?)


Step 4: Flip the material inside out, with right sides facing out. Then iron along the seam to create a fold.


Step 5: Create your channels. At the ends, I tucked under the material and created a small hem for a more finished product.


Then fold the ends over to allow for your string's channel. I pinned it down 1-1/2 inch and stitched 1/8 of an inch from the inner edge.


Then iron the channels.


Step 6: Fold the pouch in half so the inner material is facing out. Stitch long sides with a 1/4 to 5/8 inches seam. Be sure to leave 1 1/2 inches at top for the channels. Then flip the bag outside in.


Step 7: For your channel, you could also use ribbon, material, rope, etc. I used quilt binding.


Fold the binding in and stitch along the edges to keep the binding in place.


Cut two strips of string or cord the width of the bag plus three to four inches. Or cut a strip twice the width of the bag plus three to four inches. And then cut it in half to make two, or don't cut and leave only one end to sew.


To make getting the binding through the channel easier, attach a safety pin on the end and pull it through the best way you can.
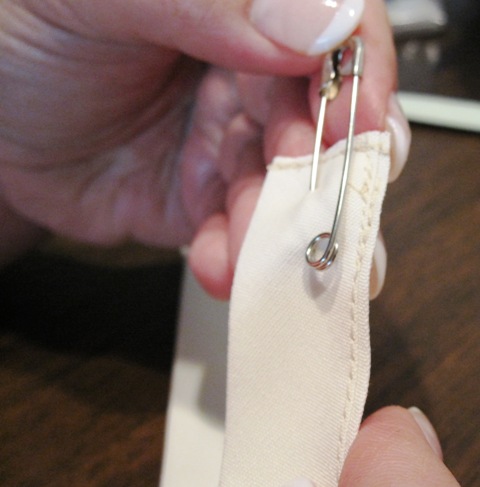


Step 8: To finish, you can either stitch together the ends of the binding or tie them. For this bag, I chose to stitch the binding together and then turn the binding into the bag so the ends weren't visable.


And then you're done! Really not that hard (for us newbies). And you can always use a bag, right? Make this bag in a variety of sizes - for jewelry, clothes, shoes, etc.


See something you like? Print it. Share it. Email it. But please, link back here when you do.

Tuesday, July 6, 2010

Is It Clean? Or Dirty?

Welcome back from the long weekend! How was your Fourth of July?

I spent lots of time crafting. Lots more time eating. And a little time singing along to some great patriotic tunes. Just how I like it. (Maybe a little less eating and a little more singing and crafting next year.)

So to slowly get back into the crafting and creating routine, I thought I'd share a quick little project I whipped up to help solve a problem.

Rooms (that's my roommate, Amy) and I battle with the dishes. It's almost like they multiple while we sleep. We wash the dishes and load them, but we forget if they're just-washed or need-to-be-washed. Know what I'm saying?

Solution: Signs!


Okay, but wait. A sticky note? That's cute if you're a bunch of college boys who are perfectly okay with... say... a sticky note. We can do better than that... Right?

Right! A few minutes on the Cricut, a quick trip through my mom's laminator, and some velcro strips later...


I just cut out some letters on the Cricut, taped them down and cut around them. Then I laminated them. You can get a sheet-size piece done at Kinko's for about $3.


Then cut them out.


Attach some velcro strips on the backs of the words and one on the dishwasher.


Then stick it on the machine. Just switch them out between loads of dishes. Dirty as soon as the clean ones are empty. Clean as soon as you turn on the machine.


I'm pretty certain this could have saved a lot of confusion in my parents' house when I was growing up.

So how do you handle the inevitable "Are the dishes in the dishwasher clean or dirty?" question when your kids or husband (or roommate) can't tell if the dishes have been washed?

♥ Kimberly

See something you like? Print it. Share it. Email it. But please, link back here when you do.

Friday, July 2, 2010

Stars & Stripes Headbands

Once I figured out how to make some simple flowers (the ones on the 4th of July wreath here), I just kept making them.

But then I found a spare headband lying around my bathroom, and I thought, "Why not?!"


You've still got a little time before the Fourth. And it's so easy! Make one for you, and your sister, and your best friend, and your daughter, and your mom.... :)


What You'll Need
long strips of fabric
sewing machine
glue gun
felt, cut into circles
buttons

What You'll Do
Check the directions here.


If the frayed edge isn't for you, totally fine. In the flowers below, I took a strip, flipped it over (with right side down), folded in the frayed edges to the center, then folded the strip in half. When I sewed the pleats, the edges were sewn under so there weren't any frayed edges on the outside.


What other type of fabric flowers do you like? I'm anxious to try other ones!


♥ Kimberly

I'm linking up to these parties:

SYS Thurs


It's a Blog Party


See something you like? Print it. Share it. Email it. But please, link back here when you do.

Thursday, July 1, 2010

Be Nice To Me, July

Raise your hand if you can't believe it's July. That's month #7. It's kind of like we're on the Wednesday evening of the week... (of months...).

Okay, that's a bad analogy.

But I can't believe it's July. Wow!

So that means we just put the finishing touches on June. Aaaannnddd... I didn't do too hot.

Things for Kimberly:
Read a book
Watch two new movies - Favorite: Toy Story 3!!!!
Attend a baseball game - Okay, technically it was the end of May, but good enough, right?
Plan a weekend trip to somewhere fun - Does it count that I talked about it?

Crafting:
Finish roommate's birthday present - Finished! See it here.
Make housewarming present for friend - I stink. I just bought them a nice bottle of wine. :(
Make a summer wreath - Does my Fourth of July wreath count? It's here.
Sew something - I totally did!!! Like here and here.
Paint some art

Gardening:
Make signs for herbs

Fooding:
Try a new recipe - Yummy recipes to come in the future!
Eat a vegetable I've never had before - Okay, I tried a fruit I had never tried before -- the fig!

Home:
Organize laundry room - uh, negative.
Organize pantry - not even close.
Set up desk - still a disaster.
Decorate dining room table - covered in Cricut and sewing scraps.

Around Town:
Try a new restaurant
Attend farmer's market every other weekend
Attend a Barons game

Family:
Go home for Father's Day
Take little brother to a college for a visit - Not my fault this isn't crossed off! I asked him to...
Research adopting a kitty - Can't afford it...


Now... I've got some catching up to do for July.

Things for Kimberly
- Read a book.
- Watch two new movies.
- Go to a yard sale or estate sale.
- Plan a short vacation.
- Workout three days a week.

Crafting
- Make a garment bag.
- Make a new wreath.
- Try to make a ruffle shirt.
- Make some wall art for the kitchen.

Gardening
- Get a zucchini to grow!

Fooding
- Make homemade ice cream or sorbet.
- Try a new recipe.
- Try a new restaurant.

Home
- Clean out magazines.
- Organize laundry room.
- Clean and organize closet. (Make a donation to Goodwill.)

Around Town
- Go to farmer's market.
- Visit a new church.

Family
- Visit a college with the little brother.
- Help mom get ready for new school year.

♥ Kimberly


See something you like? Print it. Share it. Email it. But please, link back here when you do.

Star-Spangled Banner

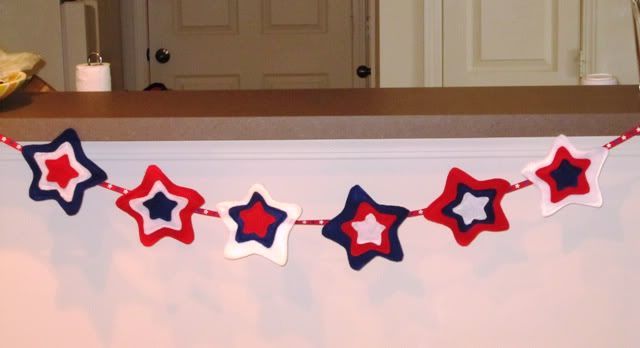
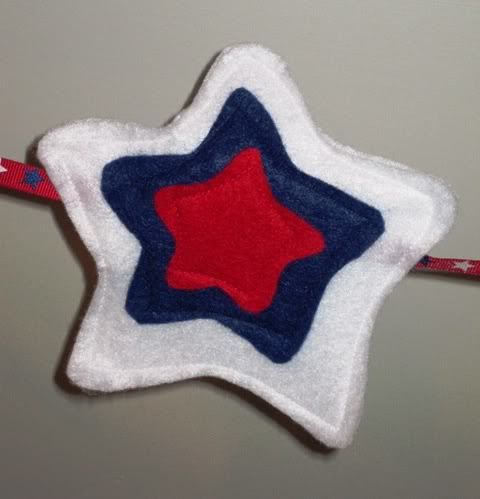
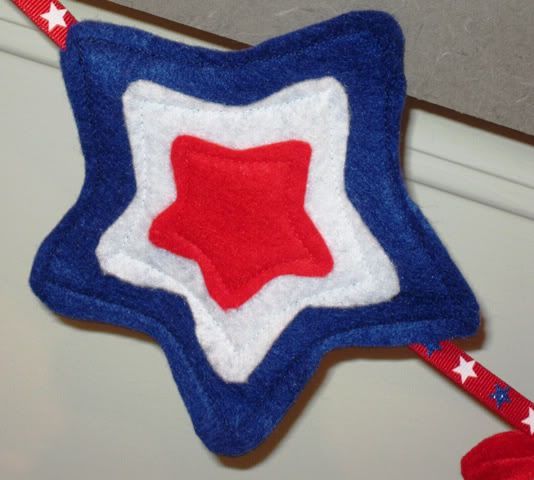
When Alison over at Oopsey Daisy shared a great felt-star garland a few weeks back, I couldn't get red, white, and blue felt in my hands fast enough. I'll give a very quick tutorial, but for a more detailed one, see her blog which has great step-by-step instructions. (Here).


What You'll Need
red, white, and blue felt
red, white, and blue thread
1/4- to 1/2-inch coordinating ribbon
scissors
pins
sewing machine

Step 1 - Draw or print three stars of staggered size (large, medium, small). I used the ones Alison linked to here.

For each star on the garland, you'll need 2 large, 1 medium, and one small. So for my six-star garland, I needed 4 large, 2 medium, and 2 small of each color. Pin the print-outs to your felt and cut them out.


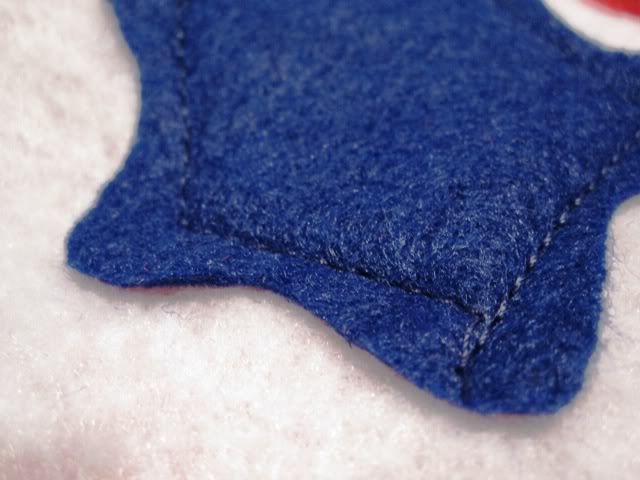
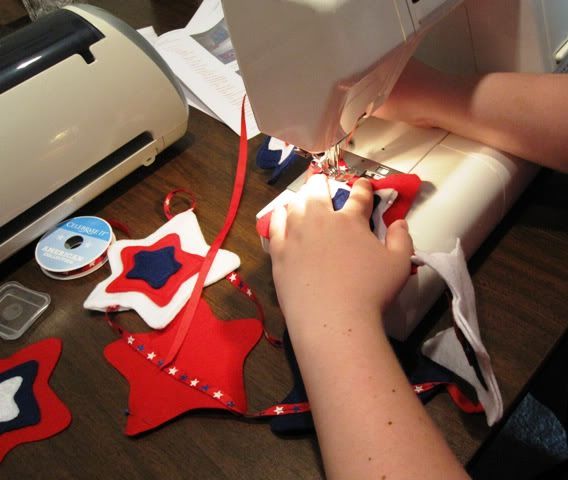
Step 2 - With the matching thread, sew the stars to one another. I sewed the small stars onto all the medium stars, then all the medium onto the large. This means you have to swap your thread out a lot, but I was able to do the whole garland in less than three hours. (All you experienced sewers could probably do this in about one.)

You could go around the stars' edges or in the center like I did (above). Whichever is easiest for you.


Step 3 - When the stacked stars are complete, sew the extra large stars to your ribbon and then the stacked stars onto the coordinating large star.


Step 4 - Hang your garland, and you're done! Happy Fourth of July!


♥
Kimberly


I'm linking up to these parties:


It's a Blog Party


See something you like? Print it. Share it. Email it. But please, link back here when you do.

LinkWithin

Related Posts with Thumbnails